


Cloudflare Tunel——无需公网 IPV4 无需内网穿透也能够通过域名向互联网提供服务。
前提
- 长期托管,Cloudflare 已经托管了一个域名
开始搭建
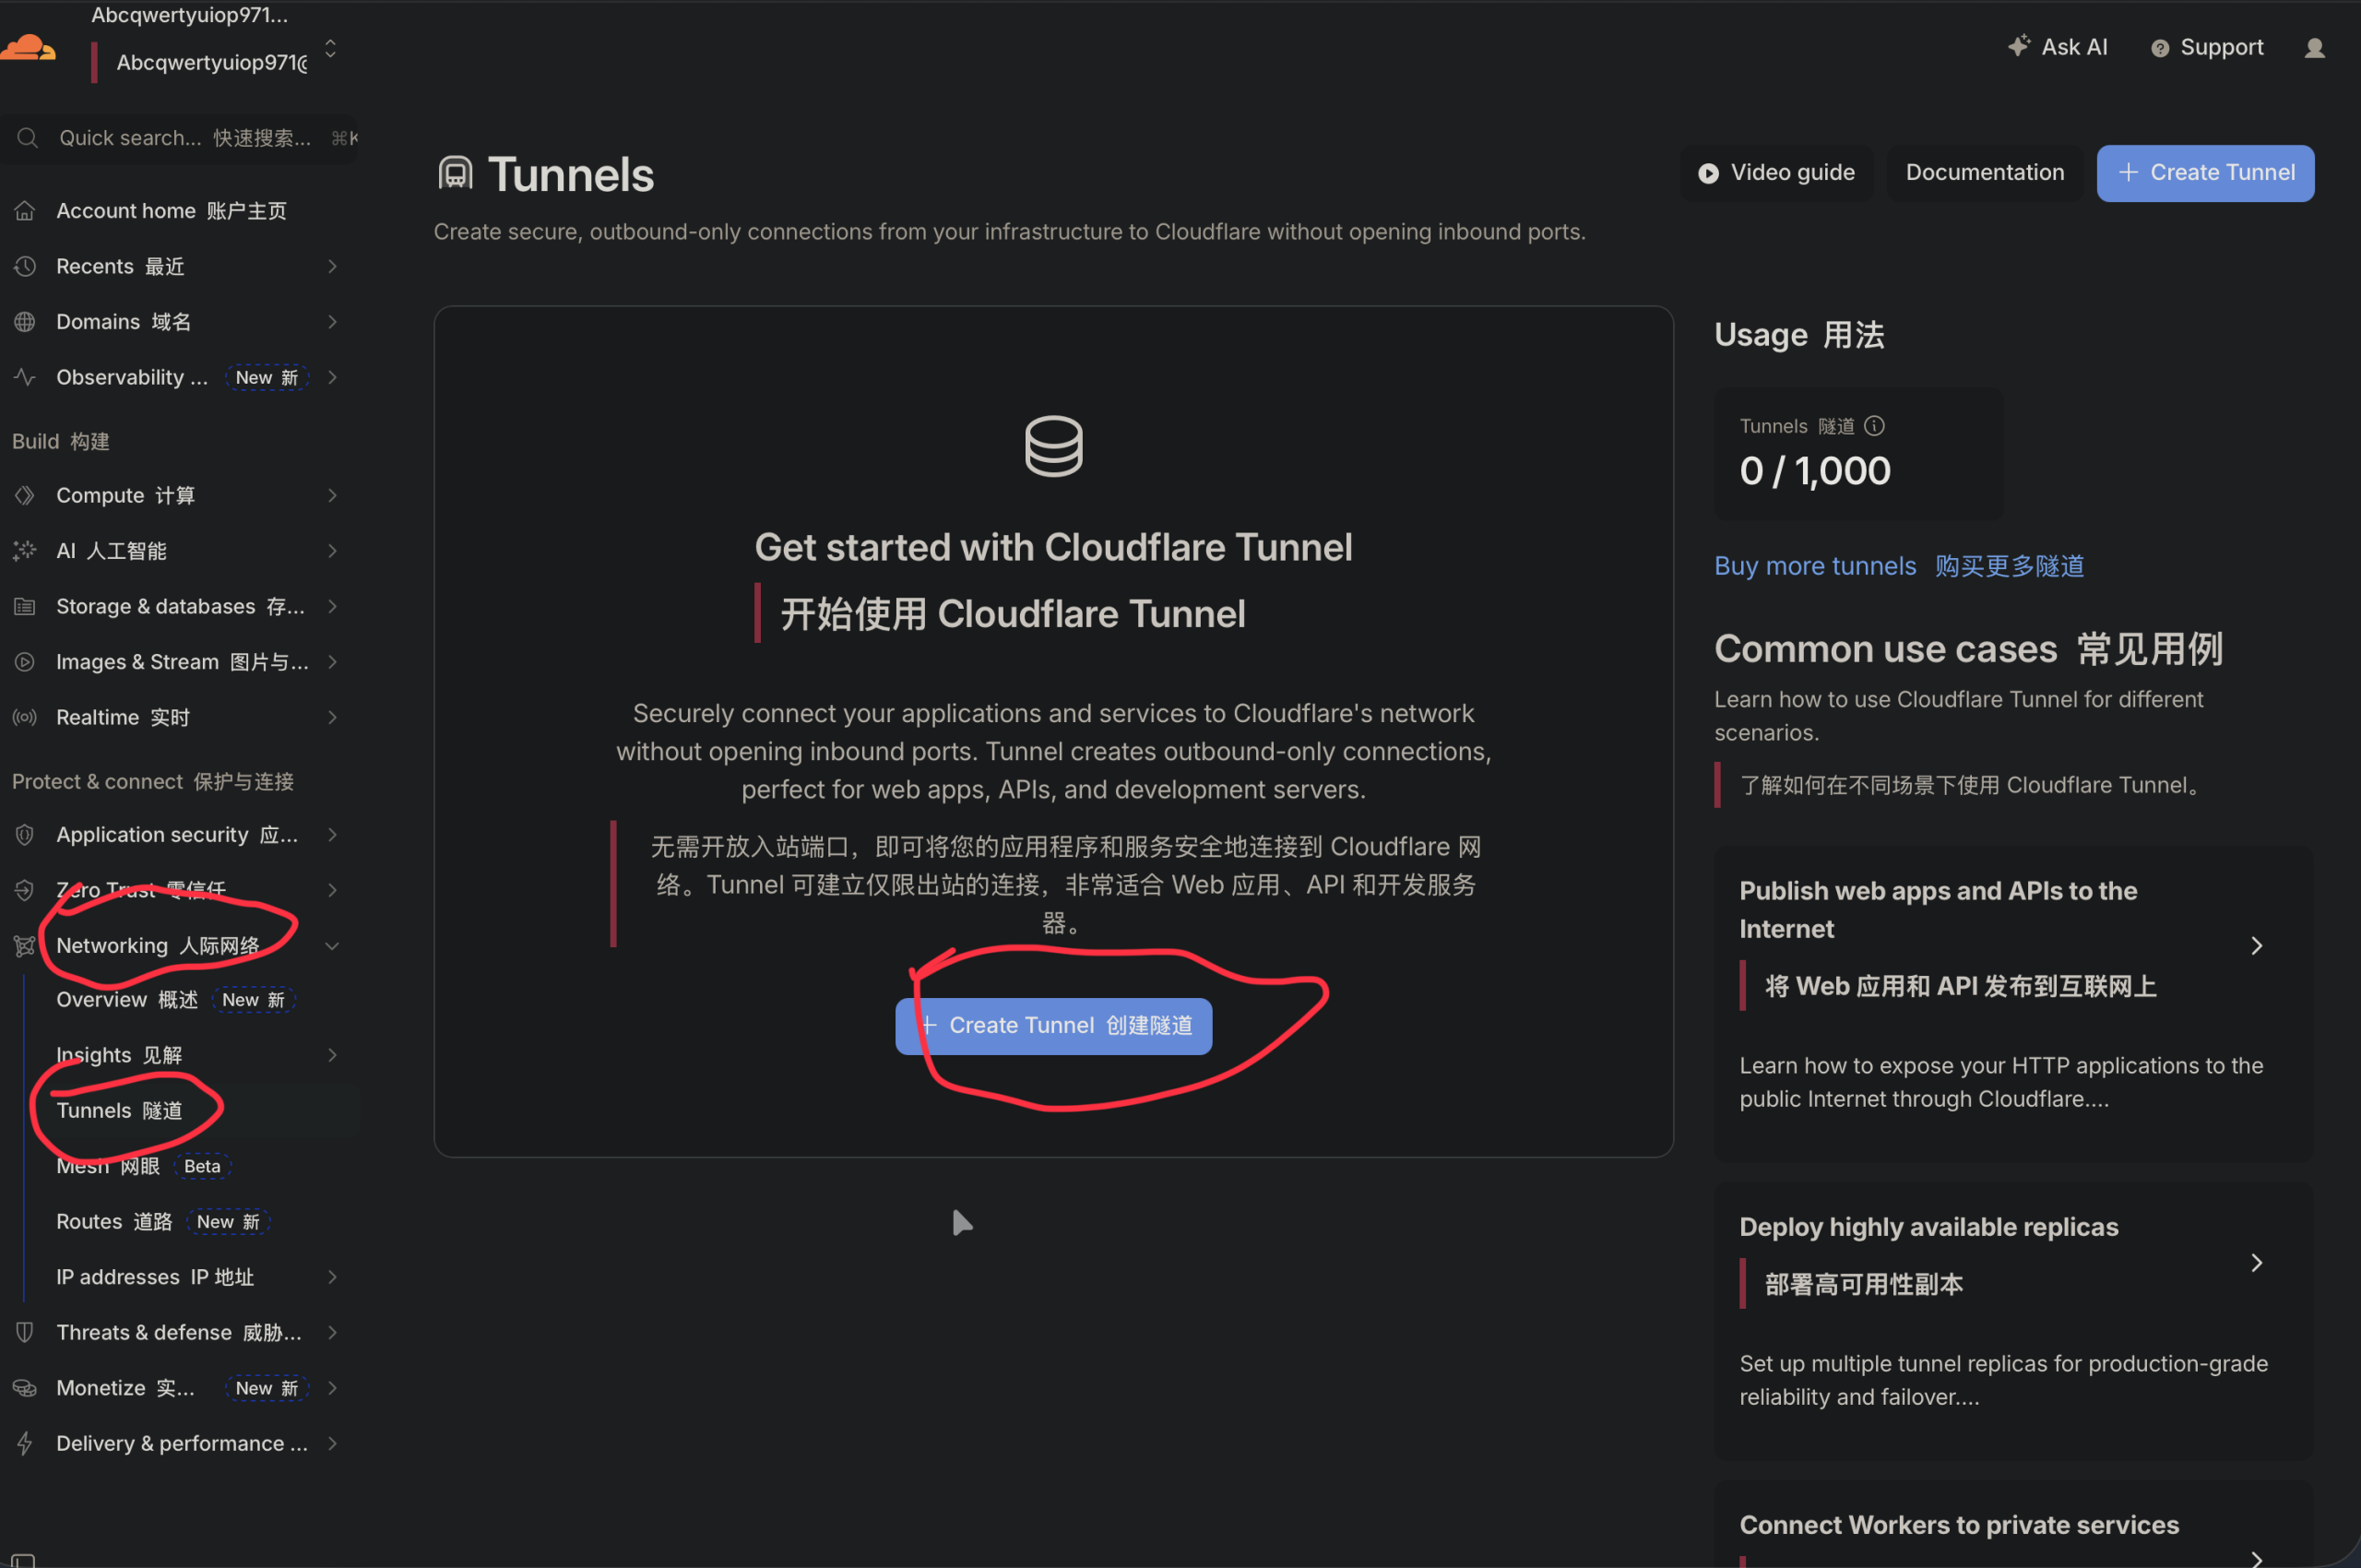
点击  Networking-Tunnels-Create tunnel
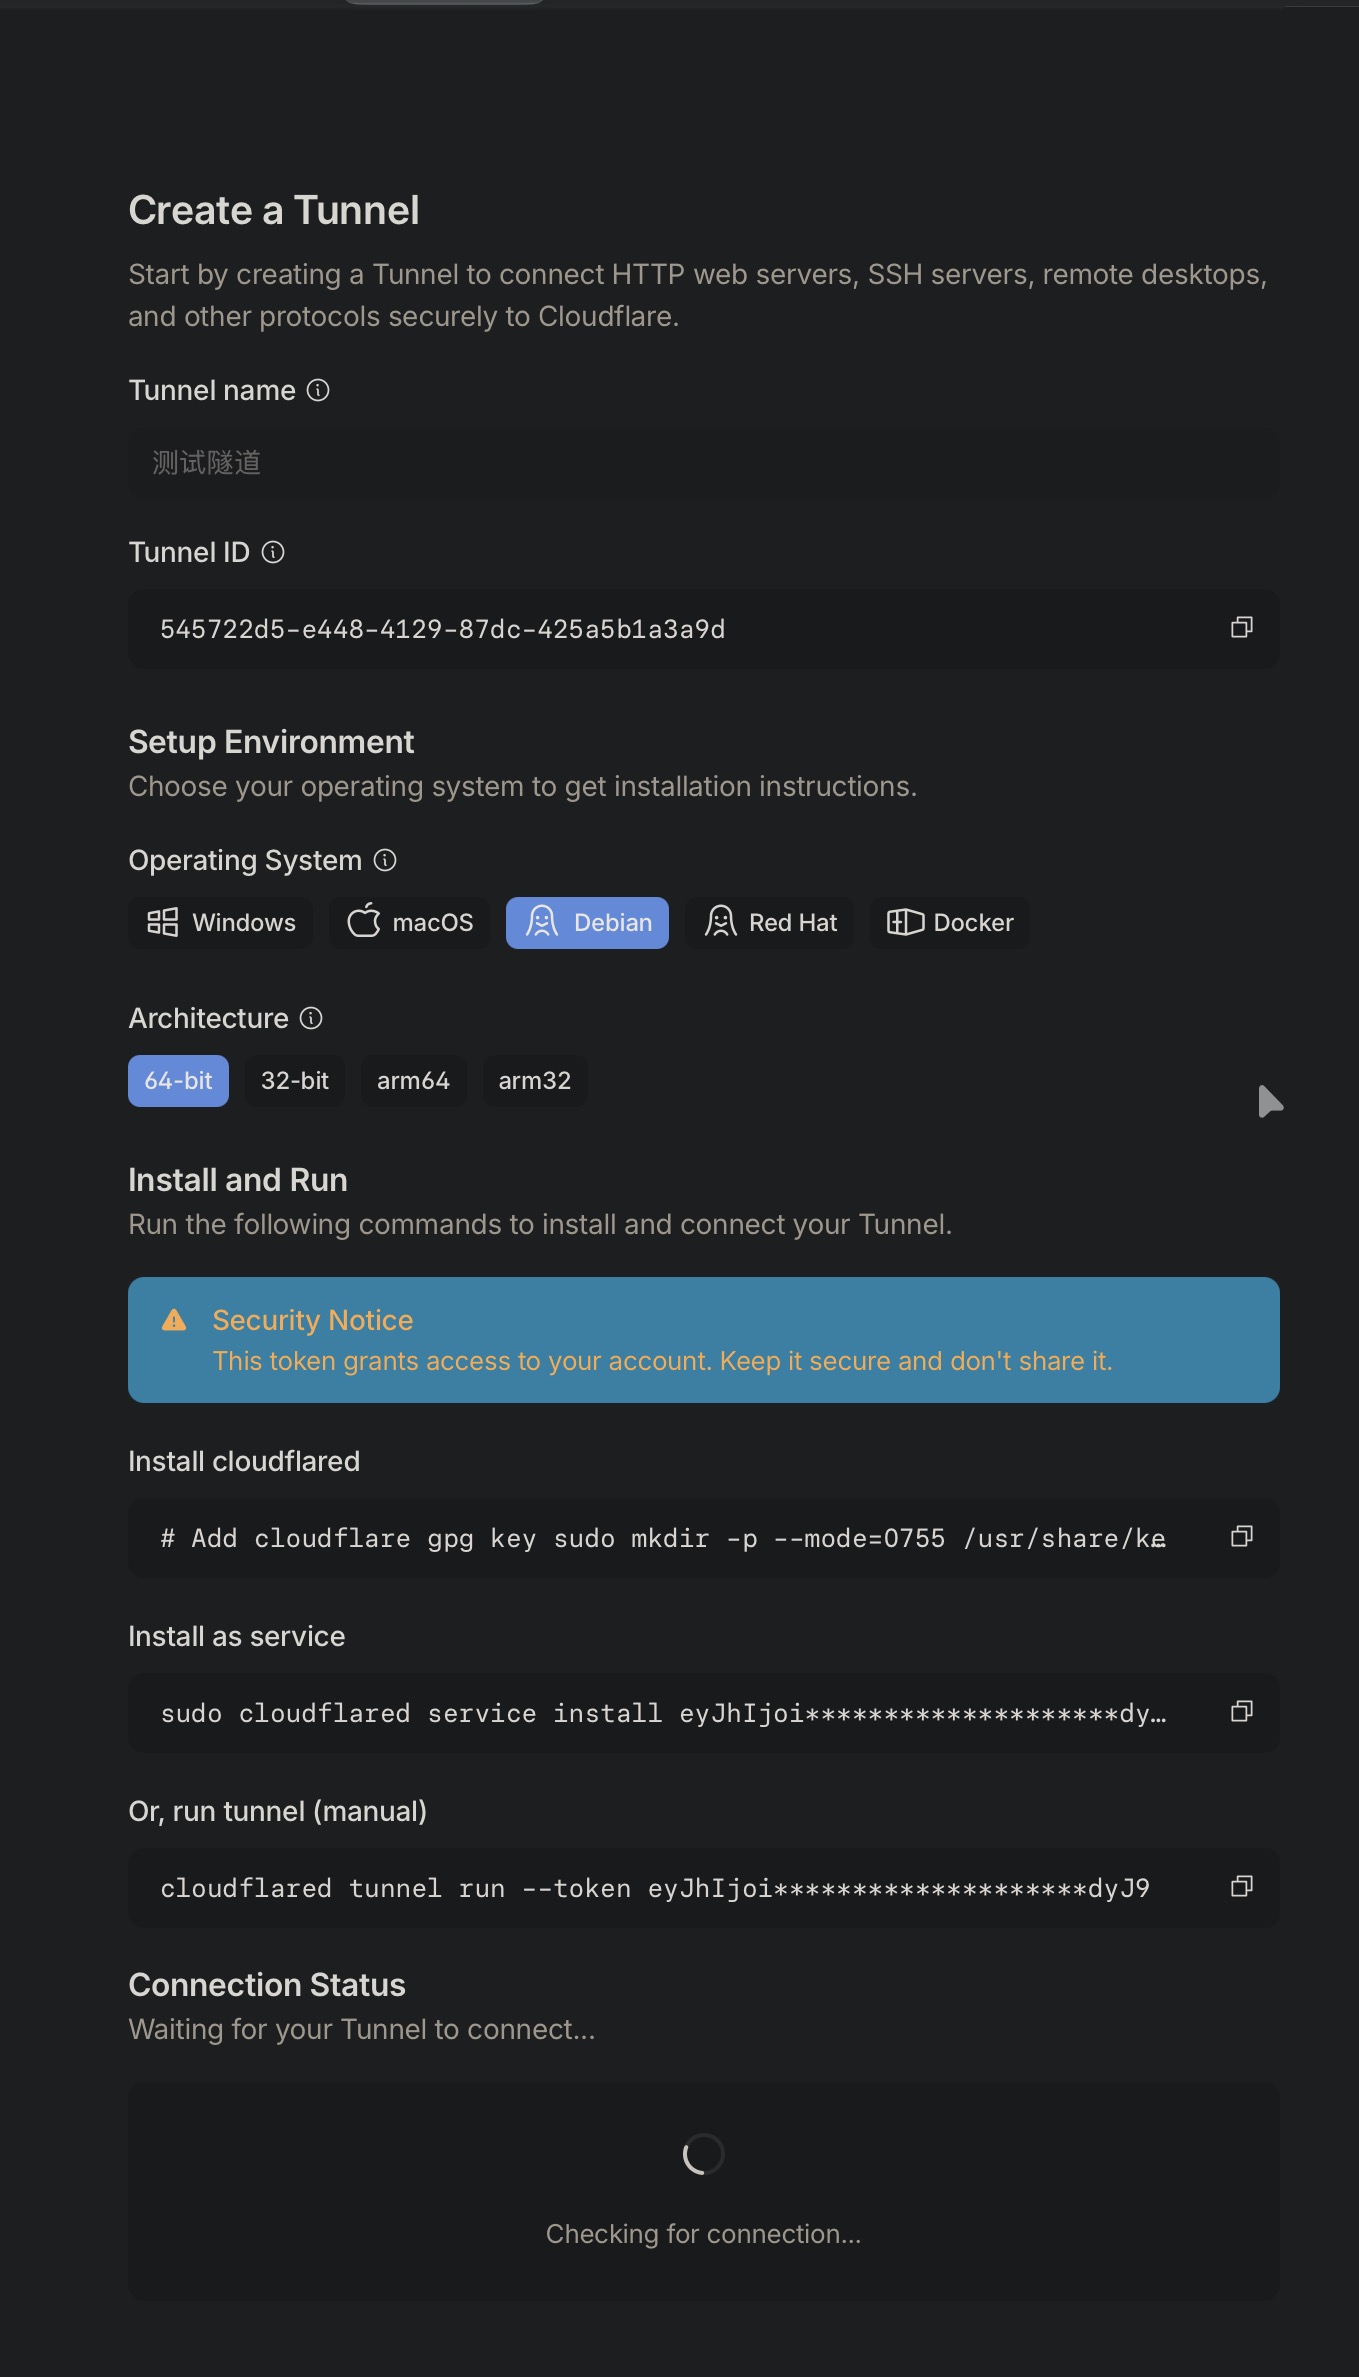
接着按照提示安装插件
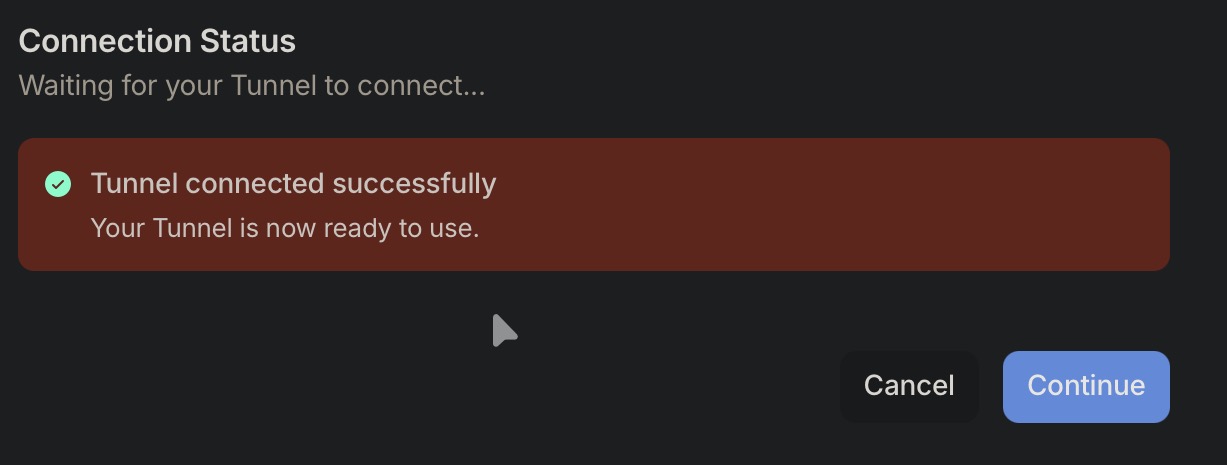
随后安装成功提示连接点击继续
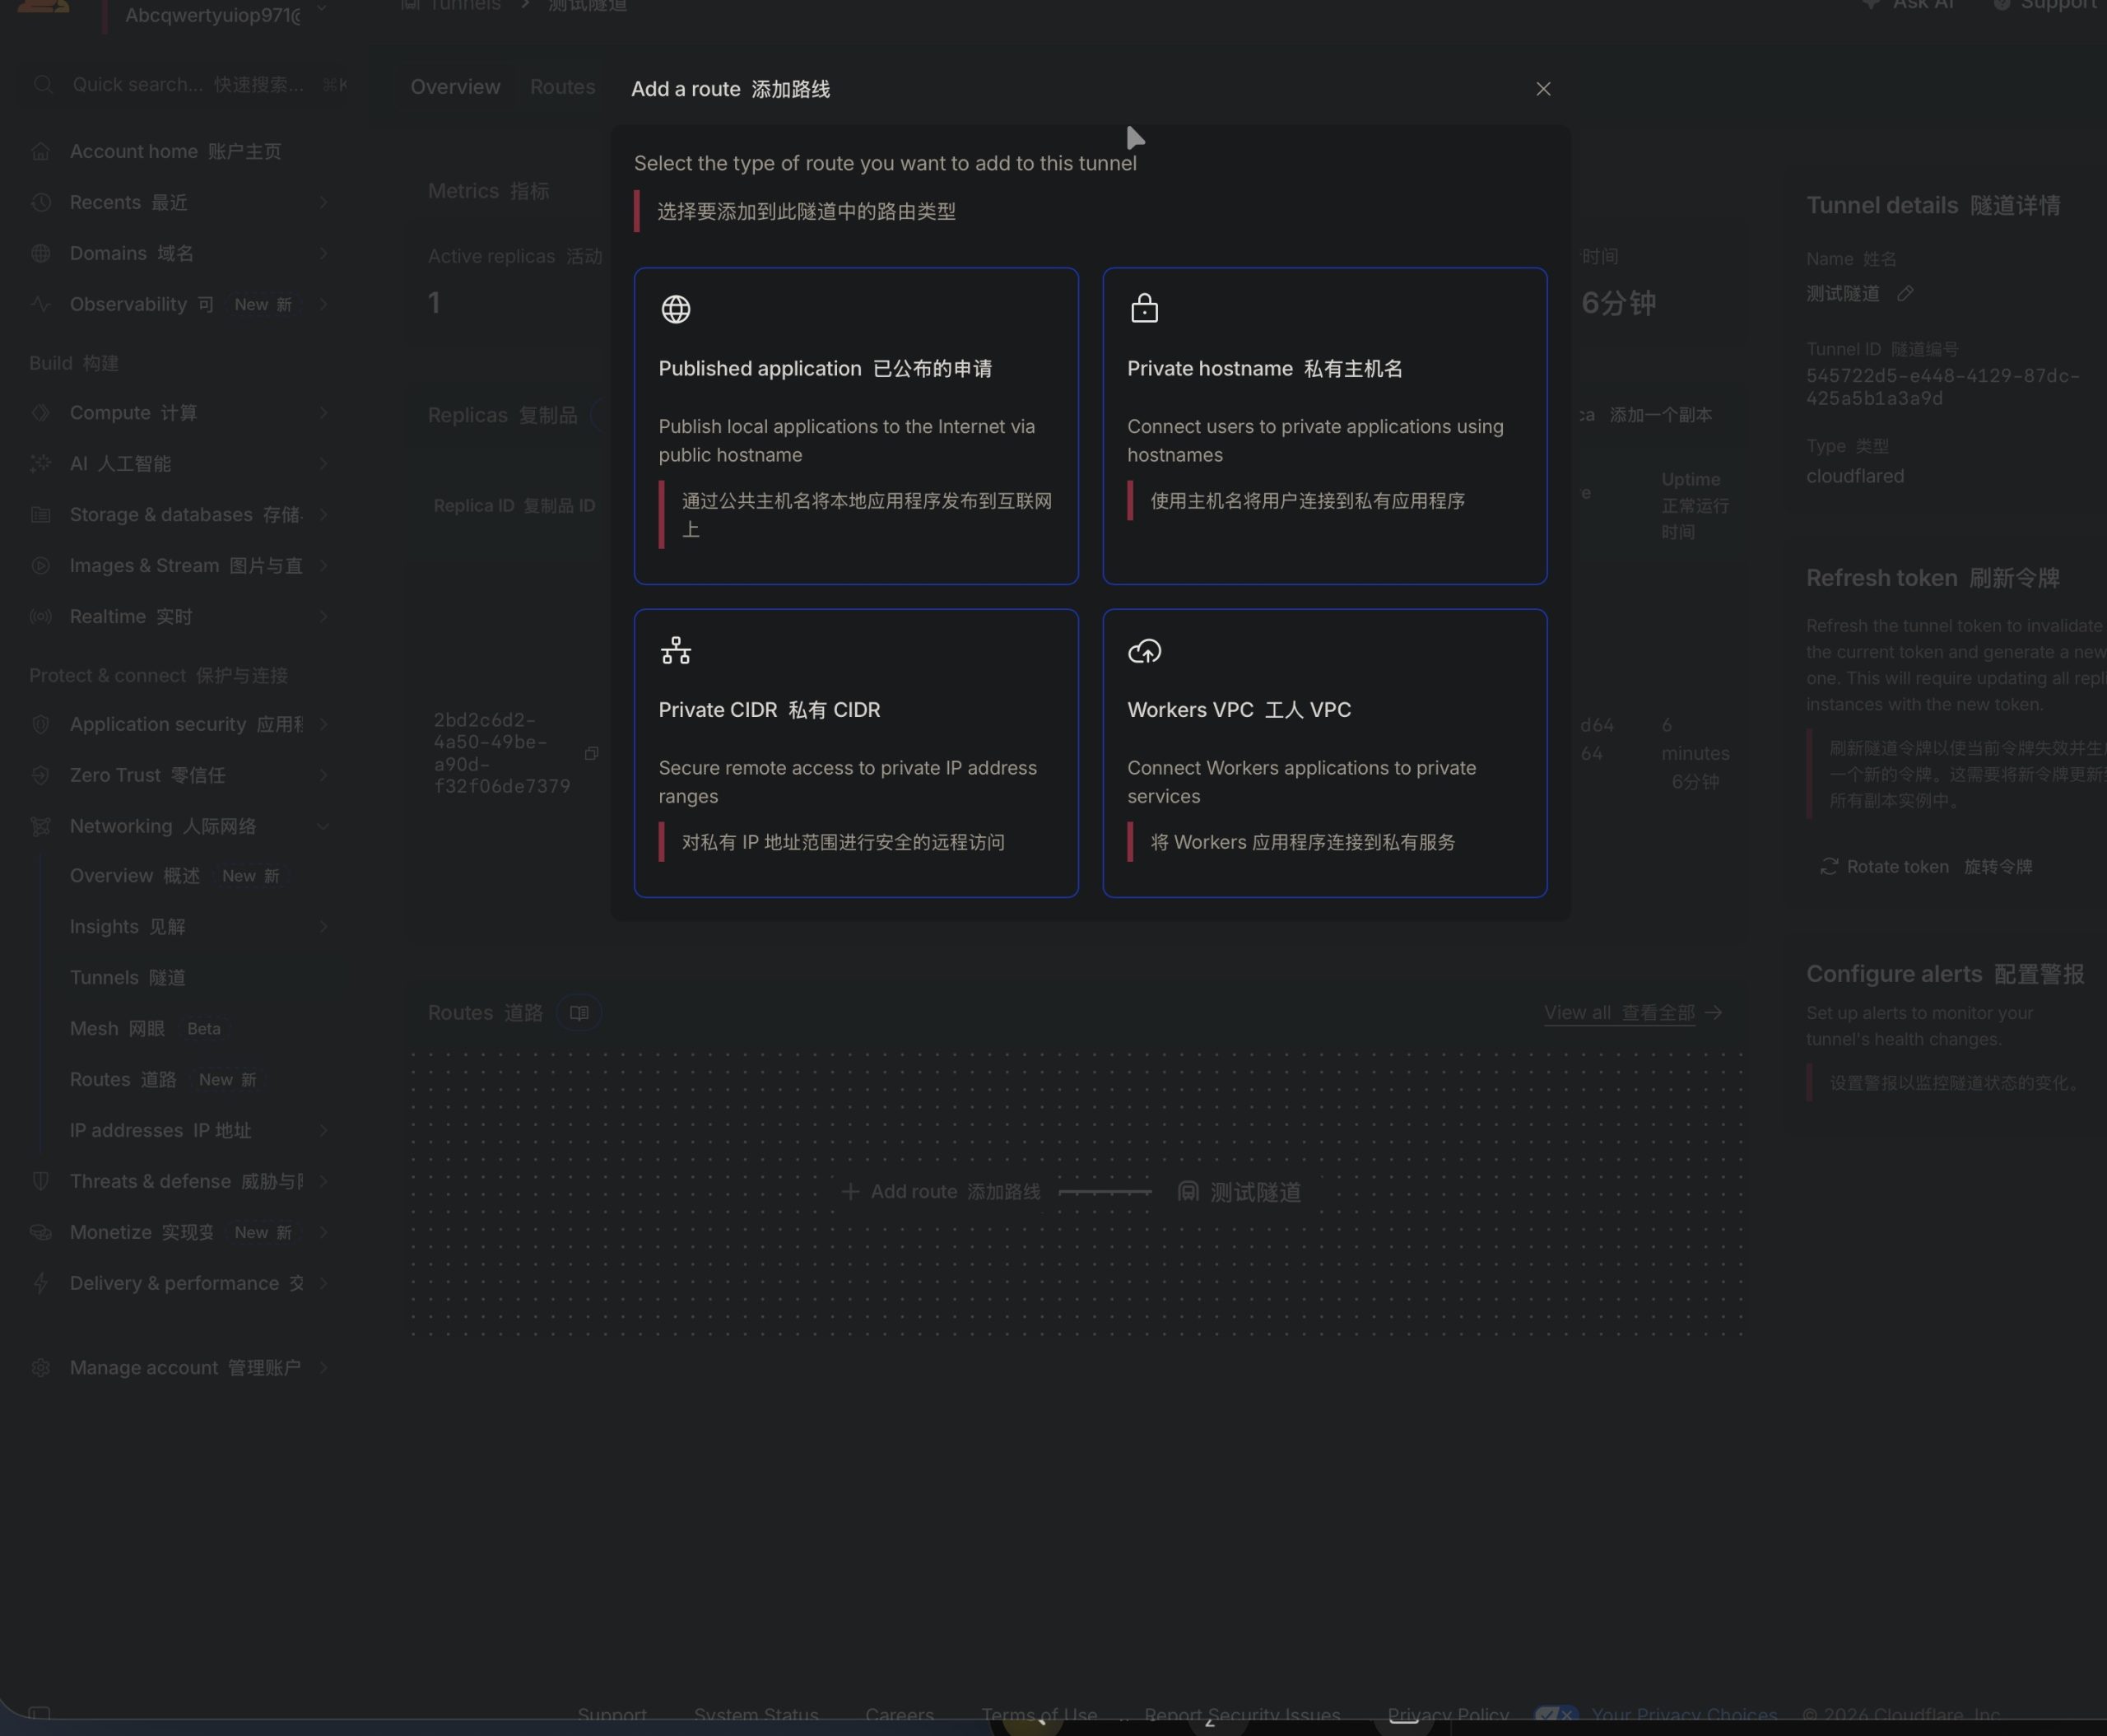
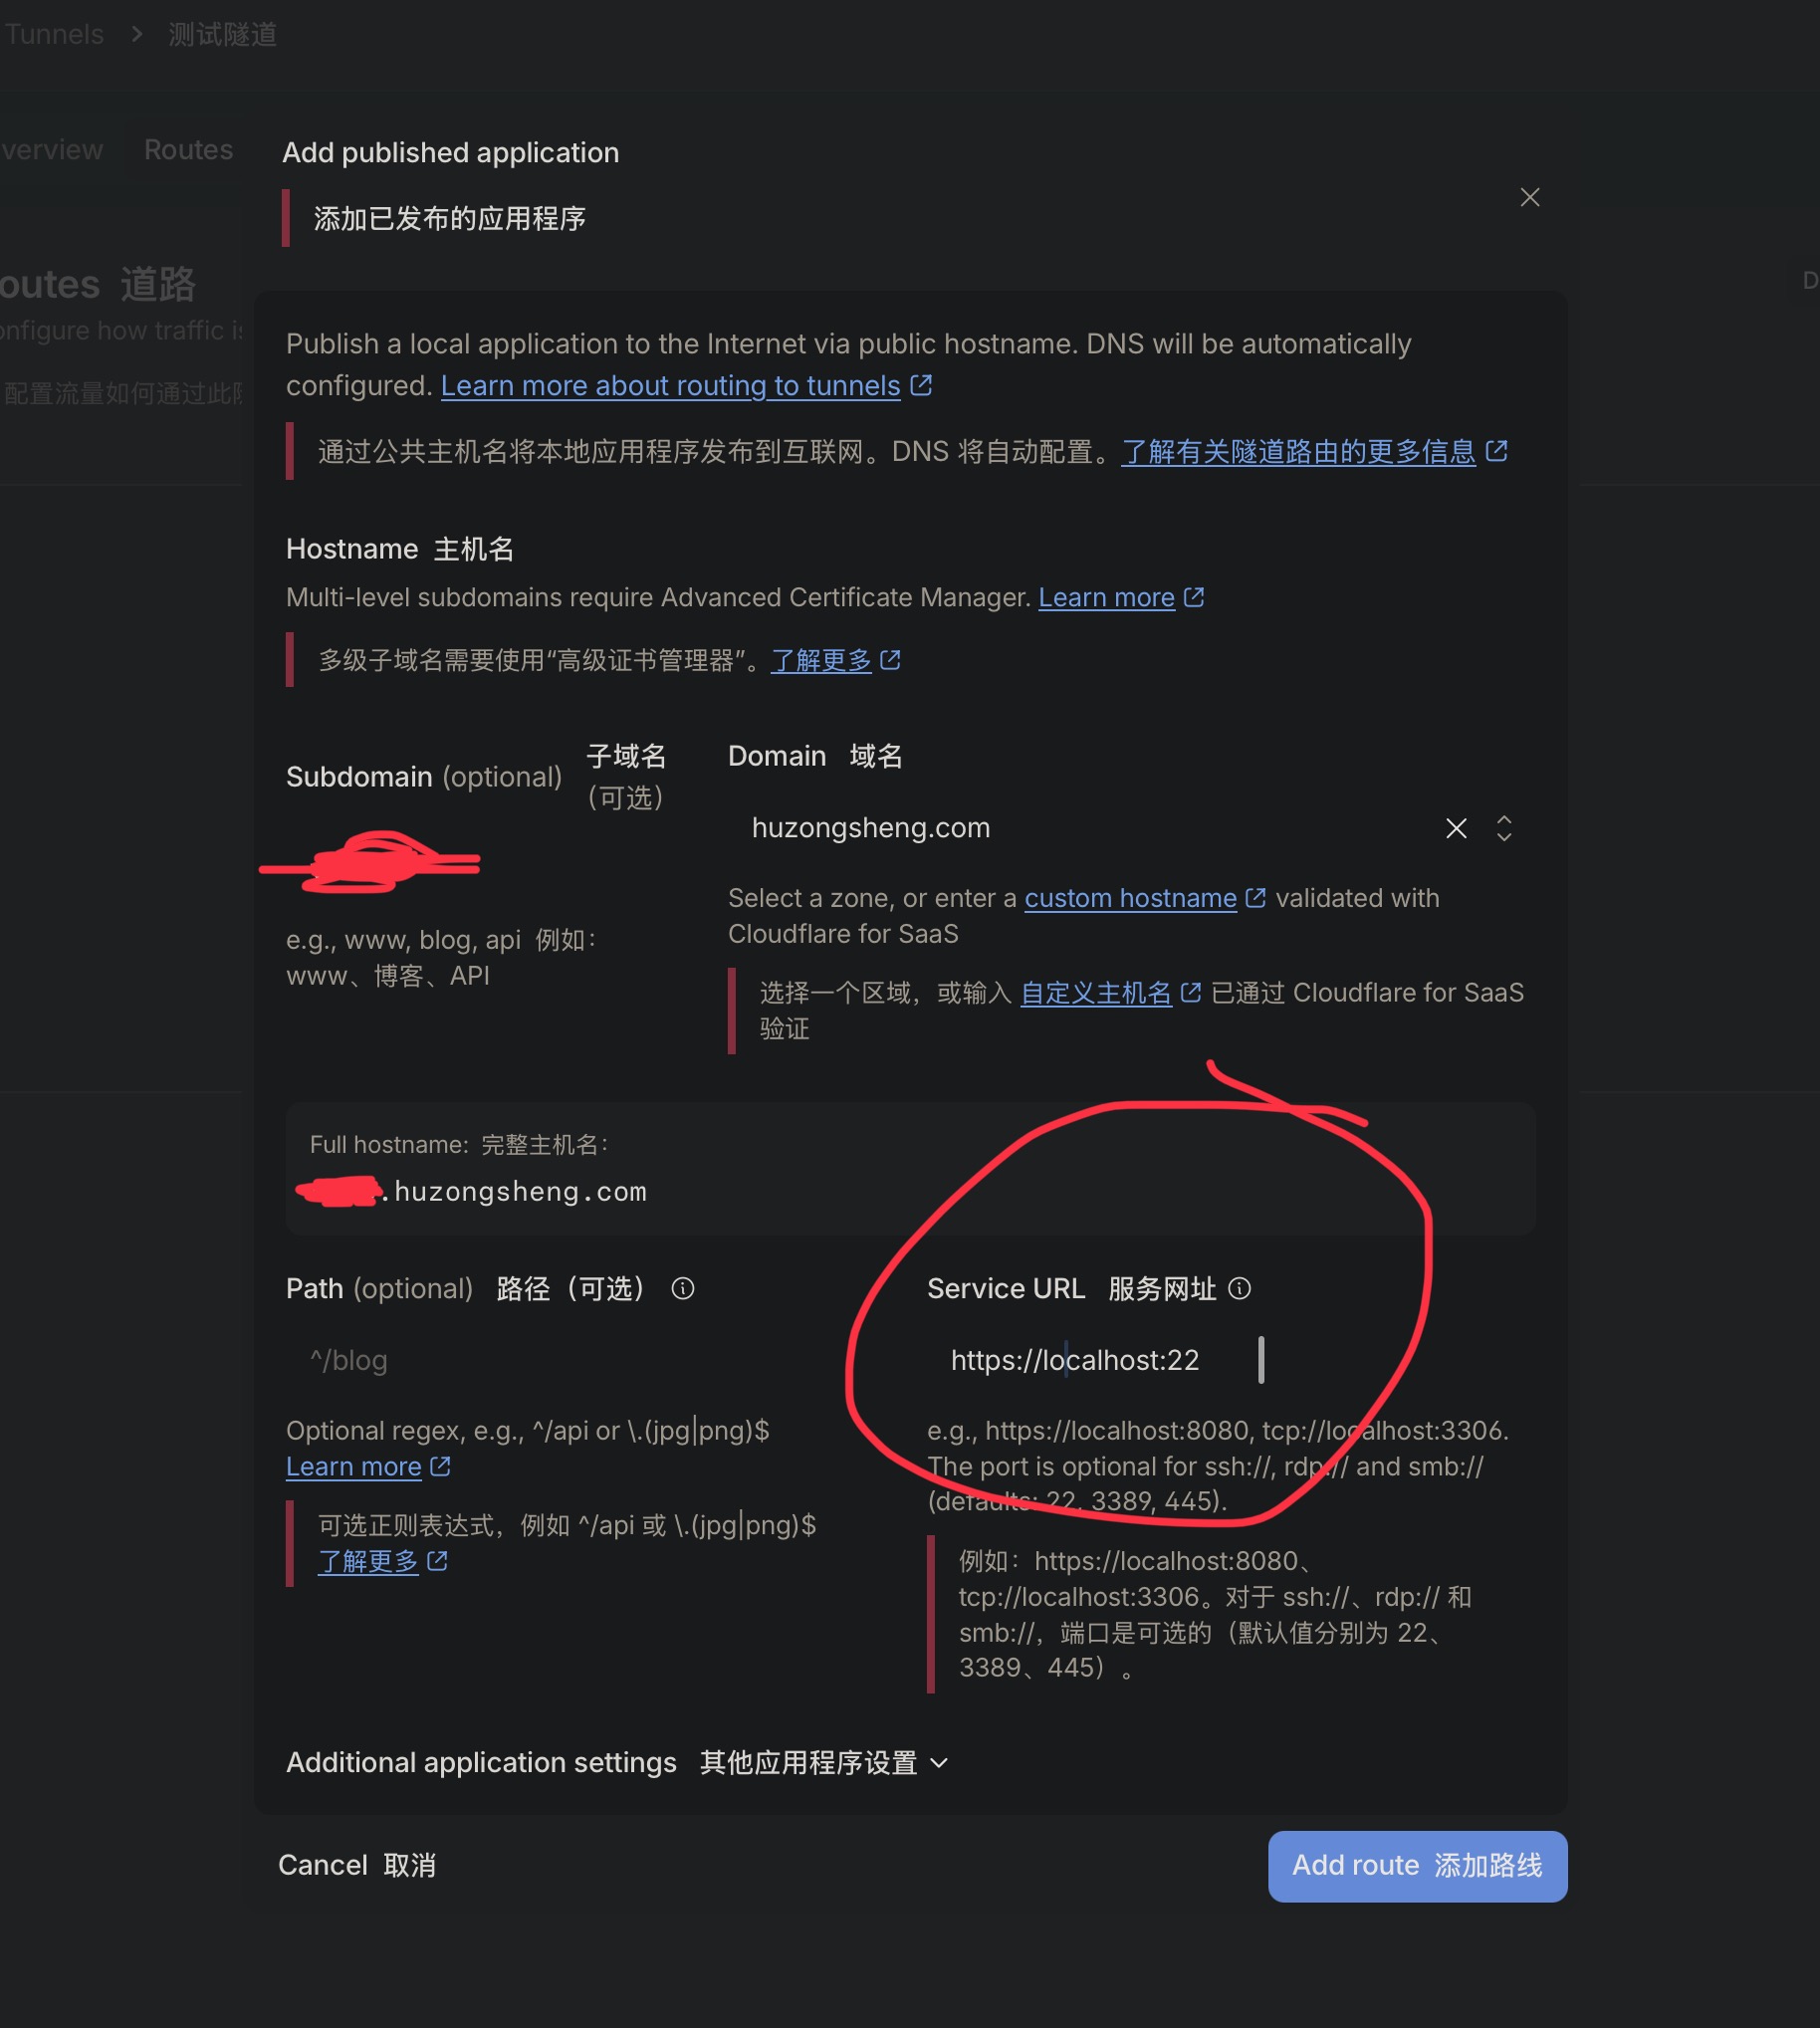
找到刚刚创建的 Tunnel 选择 Action – Configure – Add route – Published application

速度如何?
我安装了类似中科大网页测速的工具名叫 LibreSpeed。以下是 docker 部署代码。
docker run -d \
  --name librespeed \
  --restart unless-stopped \
  -p 127.0.0.1:8765:8080 \
  -e MODE=standalone \
  -e TITLE="我的网络测速站" \
  -e TELEMETRY=false \
  -e USE_NEW_DESIGN=false \
  ghcr.io/librespeed/speedtest:latest
按照以上步骤,在 Cloudflare tunnel 里面添加 服务网址 http://localhost:8765
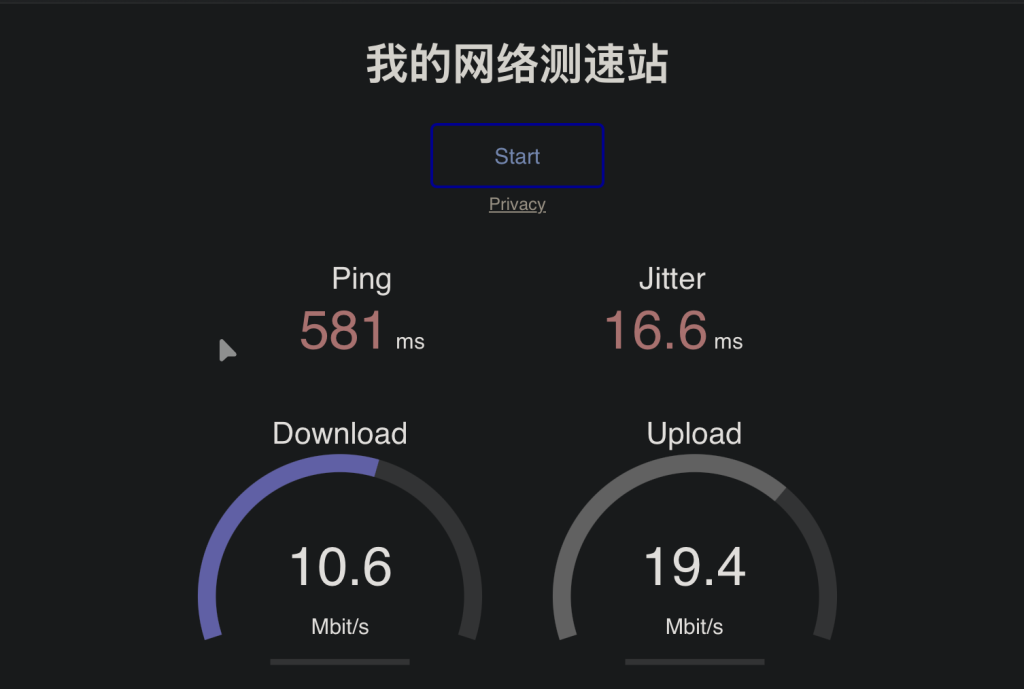
过了一分钟,我们打开自己设定好的网址。测个速看看。延迟 600 上传下载能用。一般的网页服务够用了。后续我可能都不打算买云服务器了。直接自建服务器。套一层 Cloudflare Tunnel 直接就能在不需要配置客户端(相比 Tailscale )的情况下提供服务
© 版权声明
文章版权归作者所有,未经允许请勿转载。
THE END







暂无评论内容